Woooohoooo my sugar florist paste arrived which means I can start to introduce you to the wonderful world of sugar craft and cake decorating! So I thought I would start where I began, with a rose. Roses look beautiful on cakes and for wedding cakes they are the most requested flower. These flowers will also last forever, so if you have some on your wedding or occasion cake it will be a keepsake for when the cake has been gobbled up!
I'm going to teach you how to make a simple rose. It looks fiddly, but trust me, once you've got the hang of it you will be making these with your eyes closed.
 You will need:
Sugar florist paste- I use Squires Kitchen's sugar florist paste. It's a little pricey, but it goes a long way!
Ball tool- You'll find these in craft stores with a baking section or online. I am using a plastic one but I would say ones with a metal ball are better. Top tip with a ball tool- keep it dry and clean!
Icing rolling pin- smooth plastic not wooden!
Polystyrine bud (1 per flower)
1 small and 1 medium petal cutters- Metal... always metal!
Icing sugar- I put mine in a shaker
5 petal cutter- best to get these online
Icing colouring- Sugarflair or AmeriColor are the best, they are £2-3 each but you use such a tiny amount they last forever.
Tooth picks
Foam pad- You can't make roses or any kind of flower on a hard surface. These are cheap as chips!
Paint brush and water cup
How to make:
1) Play with the florist paste to warm it up- it should stretch and look a bit like chewing gum when it's ready. Depending on what colour rose you would like to make (you can just do white) put a tiny dot of colour (when I say tiny dot, I MEAN TINY DOT!) Work that into the icing and that way, if you start with a small amount you can build it up. When you aren't using your florist paste, wrap it tight in cling film- it dries out really quickly!
Little tip, the colours darken slightly once the sugar paste model has set, so bear that in mind when colouring.
2) Dust your work station with icing to avoid sticking and roll out a ball the size of a £2 coin with a rolling pin. Sugar flowers should always be thin!
3) Put a toothpick through the bottom of your bud, don't push it all the way through.
4) Once you have rolled your icing, use the small cutter to cut one petal. Put the petal onto the foam pad and use the ball tool. With half the ball on the edge of your petal and the other half on the foam and press down as you run the ball around the petal.
5) Dampen your paintbrush with water (not too much)and paint around the petal. Then, with the pointed part of the petal facing towards the tooth pick end, attach to your bud. Wrap the petal around the bud and tuck one edge under the other to form a funnel.
The top of the funnel should have a hole the size of a apple pip.
6) Roll out a blob of icing the size of a cherry (it seems I have a fruit theme on this post!)and use the small cutter you used on the first bud and cut three petals. To get a clean edge, push really hard and give them a wiggle on the counter or run your thumb along the bottom of the cutter to get rid of frayed edges.
7) Then ball these petals on a foam pad as you did before for the first petal. Once they are pretty and frilly, flip the petals over and damp your brush with water. Run your brush along the left edge of the petal. Then attach the left edge of one of the petals to your bud. Leave the right side hanging. Then attach the other petals in the same way. They should be evenly spaced to make a propeller shape.
8) Excuse the dye under my nails... I am just so glamorous these days I tell you. Then dab some water in the inside of the loose corner of each petal. Then fold the loose corner onto the bud. Don't press the petal flat to the bud!
Leave on one of these drying pads. You can get these super cheap online. They are great for setting all types and shapes of flowers!
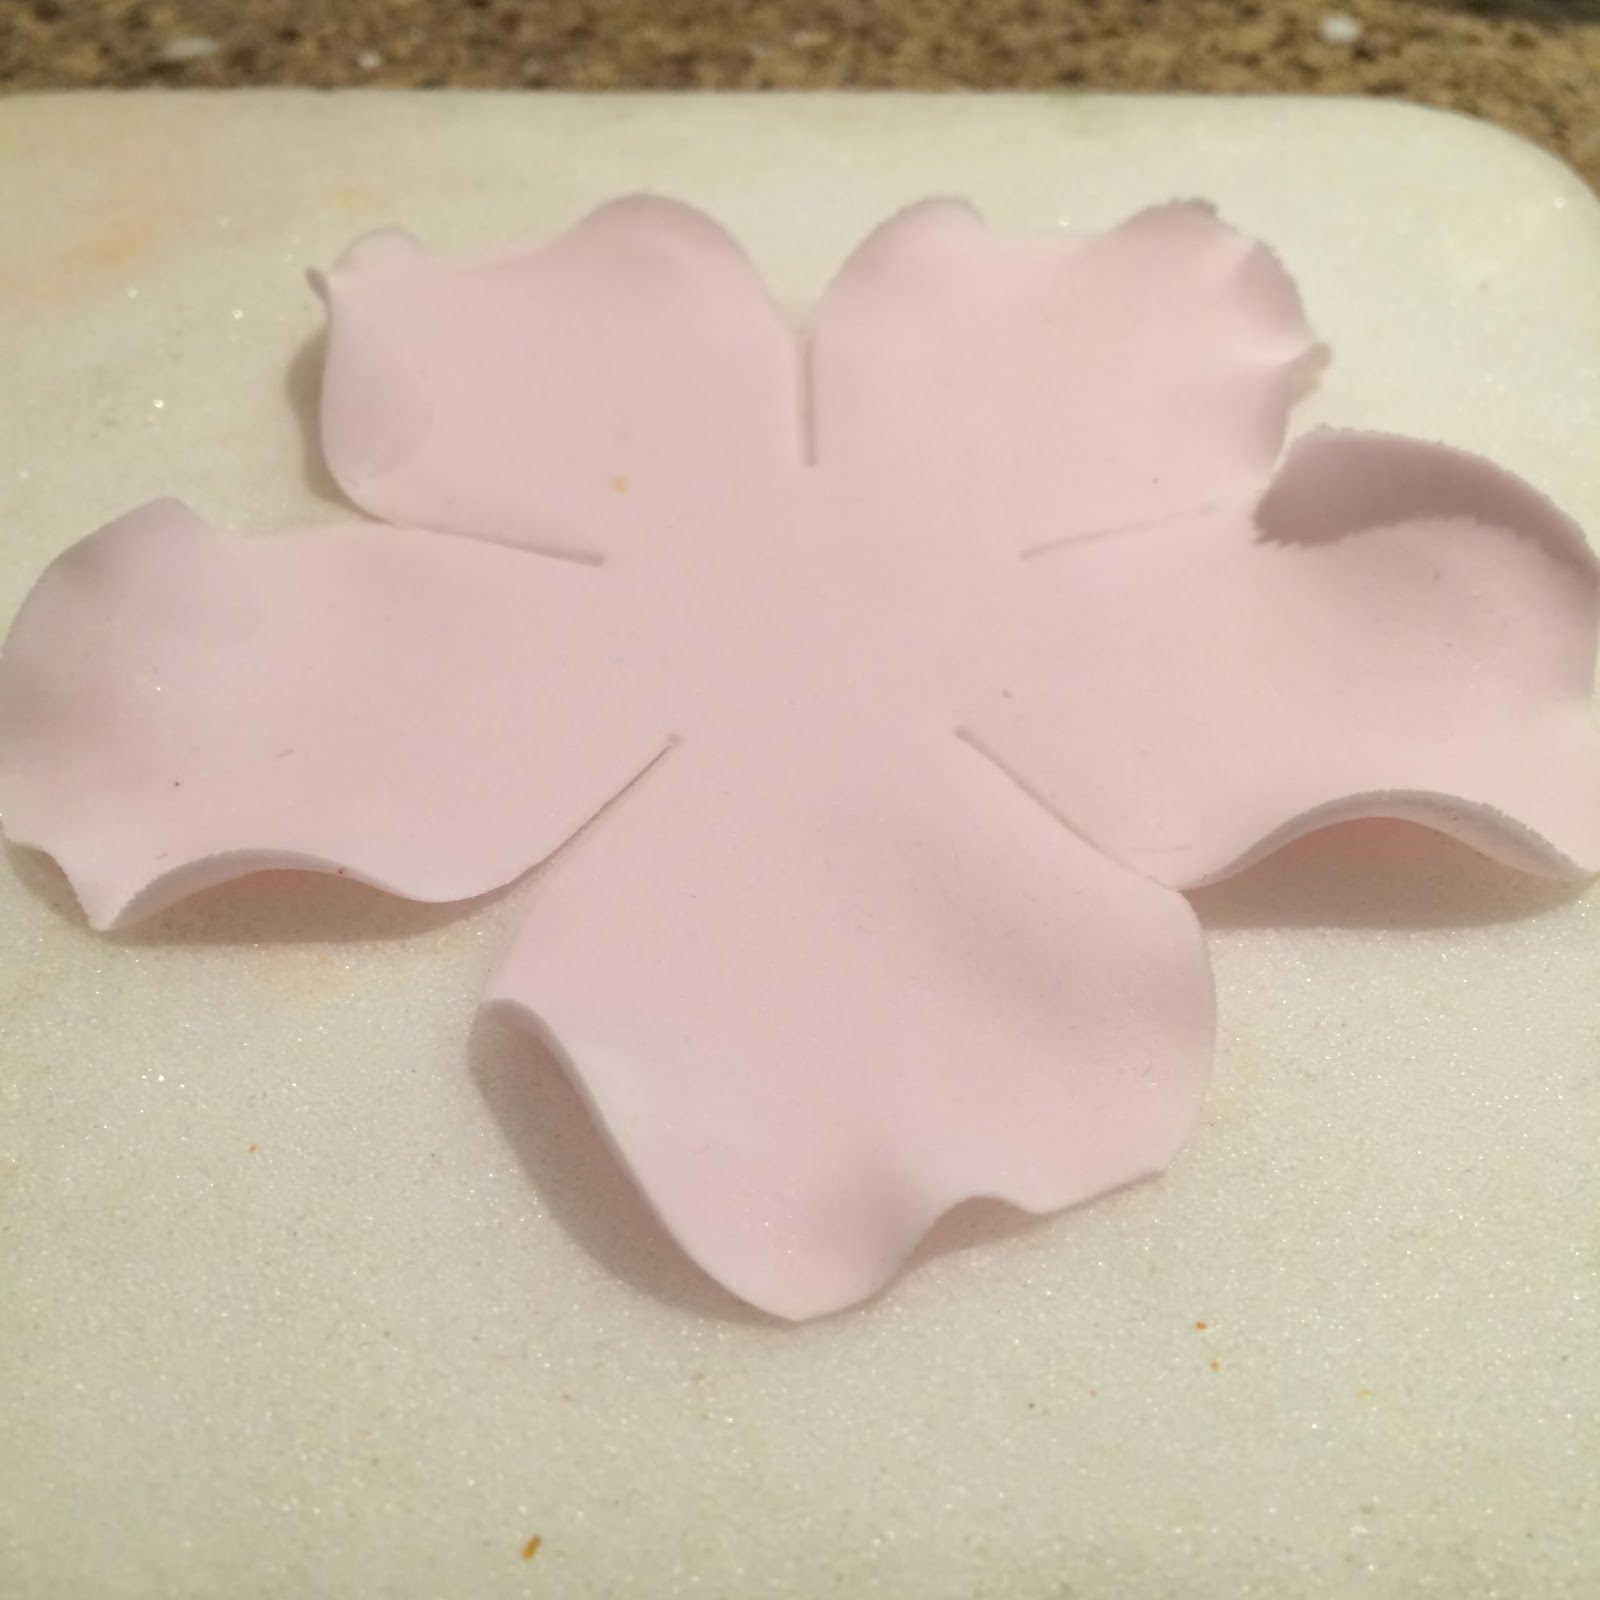
9) So we've upgraded from a cherry to a small plum now! Roll out a plum sized ball of icing(on a surface dusted with icing sugar!) and cut with the plastic 5 petal cutter. Make sure to press down hard and give it a wiggle to ensure clean edges. Then pop your flower onto the foam pad and ball each petal.
10) Then flip your flower and using a toothpick press down and roll and curl the edges. Don't make them too pointy!
11) Flip your flower again and damp the centre and left side of each petal. Slip your hand under and pierce the middle with your toothpick bud.
12) Pick up your petal and attach to the bud. Do this the same way you attached the 'propeller' petals. Keep pinching and moving the petals into shape. Keep it loose and natural :)
Make sure your petals are evenly spaced and if you need to move them about then do! Also avoid the middle of the rose being higher that the outer petals.
Rest your rose onto the flat side until it's hardened. Using the medium sized cutter, cut 6 petals for your outer petals.
13) Ball the petals, flip and curl the edges with a tooth pick.
14) Then flip the petals again and dampen both edges to form a V. With your flower still facing down, attach your first petal, then follow with the rest. It is really important that the six petals are spread evenly. (I imagine it like looking at an orange from above- I'm obviously craving fruit!) Make sure they are the same height as the rest of the petal layers.
You will need to keep tweaking it to get the shape you want but just avoid flat petals or over curled edges! Then pop on the side to set. You can make these in large batches and they look so beautiful and real.
Love Hana xxx